


Chickens for Sale: Top Ten Things To Consider When Buying Chickens For A Smallholding
When buying chickens for your smallholding or back garden, there are several important factors to consider ensuring that you choose the right birds for your needs and provide them with a happy and healthy home. Here at Pipinchick, the team has put together the top ten things to consider when buying chickens for your smallholding or back garden:
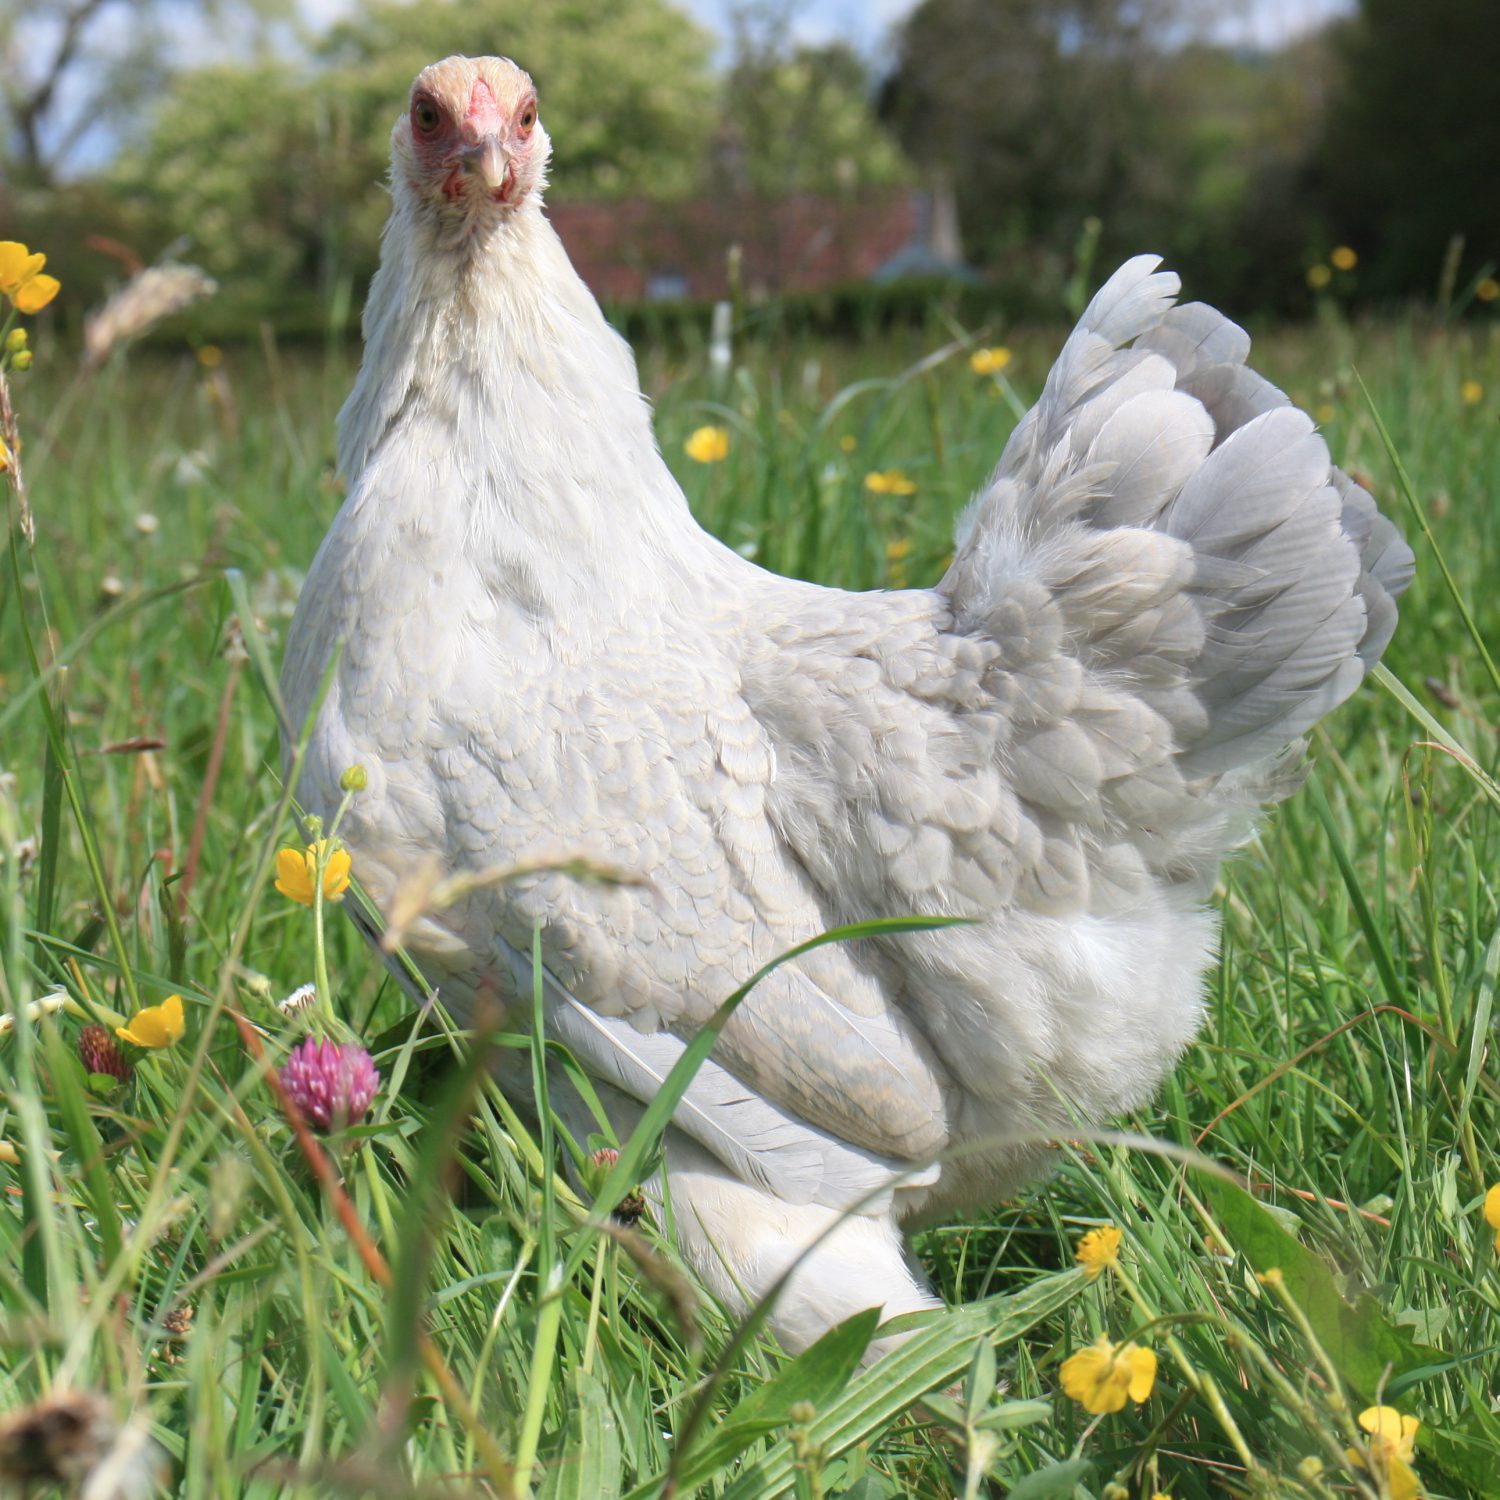
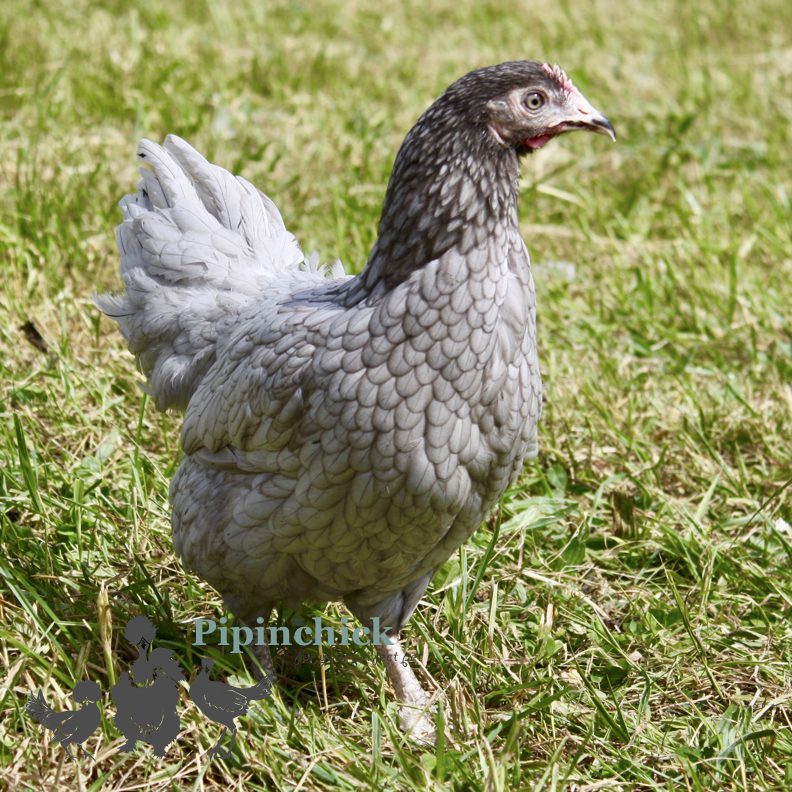
1. Breed Selection
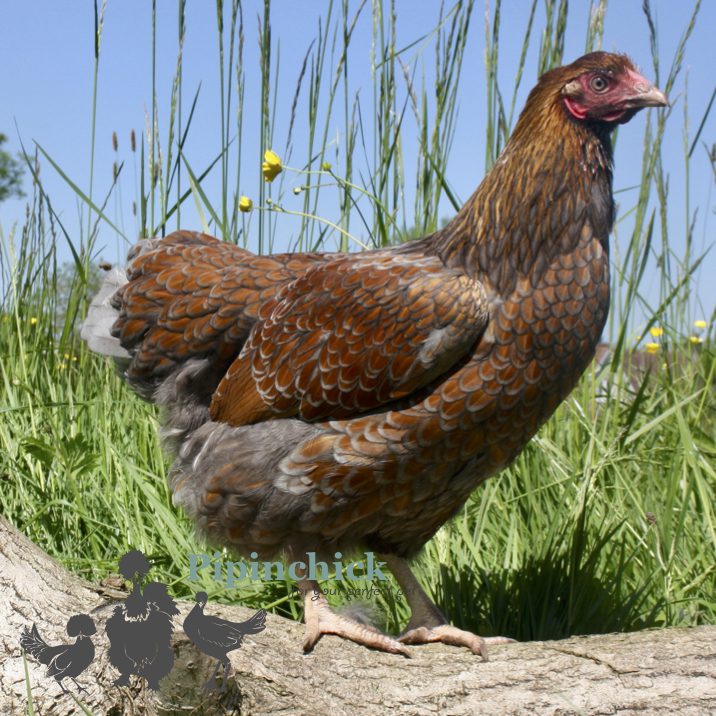
Begin by selecting a chicken breed that suits your goals. Common breeds in the UK include Sussex, Rhode Island Red, Silkies, Bantams, Orpington, and Leghorn… among others. All breeds do have different personalities and requirements so ensuring you select the correct breed for your small holding is essential. To do this you need to consider factors like egg production, space, housing, breed compatibility and temperament. To help you, you can always use our breed selector.
2. Space and Housing
Plan your chicken coop and run carefully. Chickens need protection from predators and shelter from the weather. Make sure you have enough space for the number of chickens you want to keep. Generally, the outdoor space is more important than the space in the house, as long as you follow the manufacturer’s recommendations regarding house space you should be fine, bear in mind not all birds will roost in the house so floor space is more important when buying flightless birds such as Silkies, frizzled feathered, Brahmas and Cochins as these birds will most likely nest on the floor of the house.
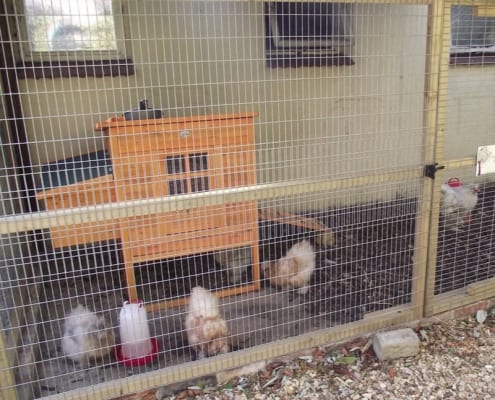
The run space is more important as this is where they will spend the majority of their time, at Pipinchick we recommend 1 mtr sq per bantam or small bird and 2 mt sq per large breed and with giant breeds such as Brahma, Cochin etc… You may need to look at 2.5 – 3mtr sq per bird. At Pipinchick we believe the best set up is a suitable house inside a secure walk in run, this allows you to get in with your hens, interact with them, cover their run area adequately during Avian Flu flock downs and will also allow for easy cleaning and hen maintenance, you can then also utilise the vertical space with perches, swings and climbing ledges for the flight birds effectively doubling you run space.
3. Regulations
Check local regulations and bylaws regarding chicken keeping. Some areas may have restrictions on the number of chickens you can keep or specific coop requirements.
4. Sourcing Chickens
Decide whether you want to buy chicks, pullets (young hens), or mature hens at point of lay (POL). Each has its advantages and considerations. Choose reputable sources that have chickens for sale or hens for sale like hatcheries, breeders, rearers or rescue organisations. At Pipinchick, we ensure all our birds are healthy and vaccinated and we rear all our hens from chicks ensuring they are well socialised and ready for you to have as pets or layers.
5. Health and Biosecurity
Learn about common chicken diseases and how to prevent them through biosecurity measures. Quarantine new birds before introducing them to your existing flock to prevent disease spread, this is relevant if you are buying breeds from multiple places, never buy unvaccinated hens.
6. Feeding and Nutrition
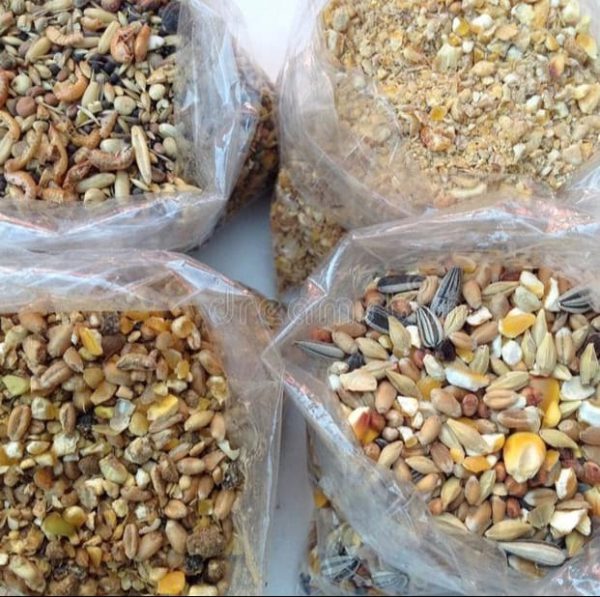
Provide a balanced diet with commercial chicken feeds that meets their life stage requirements (starter crumb, grower, layer). Chickens should be fed the relevant pellet feed as 80-90% of their overall diet. You can then add treats and supplements top, but be careful over treating, too much can cause runny bottoms, fat gain, halt in egg production and can stop your hens eating their pellet feed. Some foods you can treat include, melon, berries, corn, seeds, oats and edible flowers. Do not feed anything from the nightshade family such as potatoes, tomatoes, peppers they can also not have avocado skins or pits, dried beans or legumes, apple seeds, apricot pits or leaves or processed human foods like chocolate, cake etc...
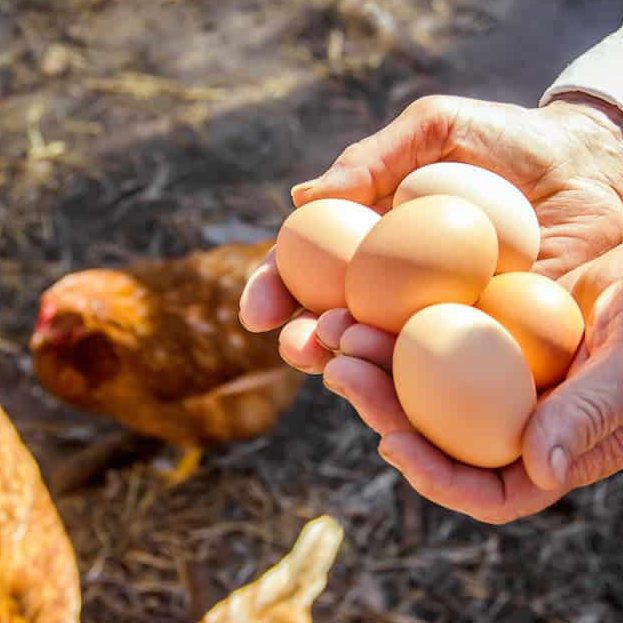
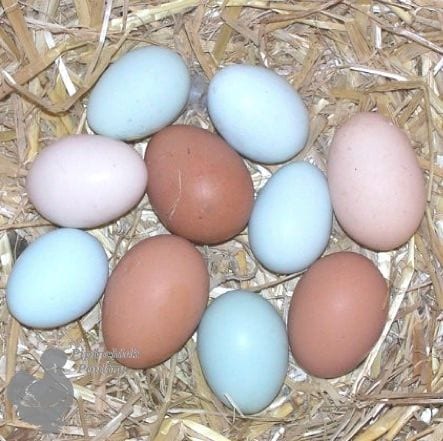
7. Egg Production
If egg production is your goal, consider breeds known for high egg production such as Hybrids, always bear in mind Hybrid chickens will lay prolifically for up to 3 years when they tend to slow or stop completely, this can also be accompanied with additional health problems such as egg peritonitis or egg binding, they also require a lot of room as they are foraging breed and need space. Pure breeds will ley less a week and tend to stop for longer periods, during the winter, however, their natural cycle can continue for up to 10years, they also tend to fair better in smaller areas and like more human interaction. Ensure you offer plenty of nesting boxes that are in quiet, darkened locations and that they are clean, comfortable, and easily accessible for egg collection.
8. Social Behaviour
Chickens are social animals and thrive in flocks. Keep at least two or three birds to prevent loneliness. Breen compatibility is important so always ask your Pipinchick team what breeds can work together or check our Breed Compatibility guide on our website. Observe and manage any aggressive or bullying behavior among your flock, don’t be shy, feel free to ask us for any help needed if you do have bully birds in your flock.
9. Daily Care
Be prepared for daily tasks like feeding, watering, and egg collection. Regularly cleaning of the coop and run and provide fresh bedding once a week.
10. Predators and Security
Protect your chickens from predators like foxes, badgers, weasels, and birds of prey. Secure the coop with strong locks and small gauge chicken wire. Consider an automatic coop door closer to protect your chickens at night, never rely on this soley and always check all of your hens have gone in safely. By carefully considering these ten factors, you will be well on your way to successfully raising chickens on your UK smallholding or back garden. Remember that chickens can be delightful and rewarding additions to your homestead when given proper care and attention.
What Is Feather Moulting In Chickens?
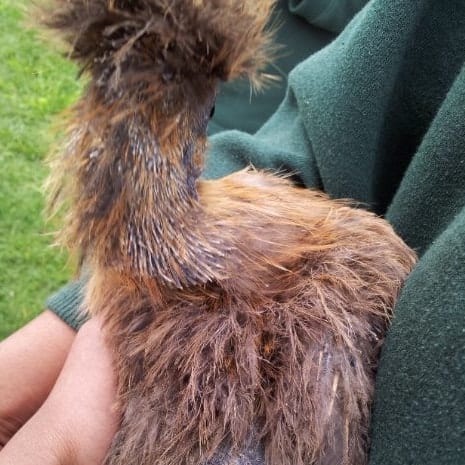
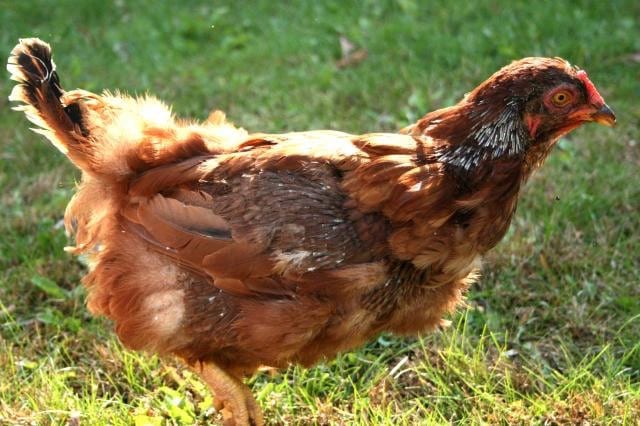
As the nights draw in and the daylight hours reduce your hen may begin going through her annual feather moult. It can be quite alarming when you see your beloved chicken is losing her feathers, the sudden change can be very dramatic and happen overnight. Although there are other reasons a chicken can lose her feathers the main cause is when they go through their annual feather moult. Don’t panic! It is completely natural and apart from some extra feed requirements there is not much to worry about.
Pet Chickens just like other animals go through a natural cycle when they need to reproduce new feather growth. Just like with cats, dogs and even humans, old growth is shed and new fur, skin… feathers are gown. The moulting process allows your chickens to shed old and worn feathers and then re-grow fresh, shiny, new ones. It is a natural cycle and will occur usually at the change of the season from summer into winter as the daylight hours are greatly reduced. The feather moult also allows your laying hens time to rejuvenate their reproductive organs as they will usually stop laying during this time.
How Long Does a Chicken’s Feather Moult Last and What Ages Do Chickens Start To Moult?
In most chickens feather moulting will begin fully once they are about 18 months old, however, some chickens will also go through a juvenile moult this can happen anywhere from 6 months up, a juvenile feather mouth is usually in very small amounts and localised to one area. Once they have a full moult the process from shedding to re-growing their feathers usually takes about 8-12 weeks but has been known to take a bit longer in some breeds.
How Will My Chicken Behave When Moulting?
Most hens will carry on about their business as usual, they should continue eating and drinking, they may even have an increased appetite for protein due to needing more than normal. They will most likely seem their happy cheerful self, although they can be a little aloof. Despite looking like something form a horror movie they will most likely seem unaffected! If at any point they do stop eating and drinking or seem overly lethargic and unhappy then this is likely to be something other than their annual moult. They will also either stop laying altogether or very reduced egg production during this time as they give their reproductive organs a rest to conserve energy to grow new feathers.
Is My Chicken Going Through A Feather Moult? Or Is My Chicken Sick?
There are a few other ailments that can cause a chicken to lose feathers, listed below:
3 Reasons Why A Chicken Can Loose Feathers.
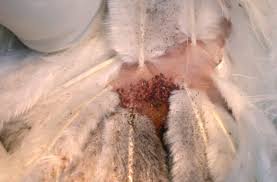
- Mites and Lice. These are one of the main alternative causes for father loss in chickens. Have a very good look at your chicken’s skin, part the under-fluff especially around their back ends and see if you can see any nasty creepy crawlies on their skin. If you have a mite or lice infestation that has caused feather loss you should be able to actually see them and there should also be tell-tale signs of lice/mite debris, paling of the combe and wattle and skin irritation. This should be treated immediately. How to Treat Your Chickens for Lice and Mites.
- Broodiness. This can also cause a hen to lose feathers but is more prevalent in pure breeds and bantams such as Silkies, Pekin Bantams, Polish Hens etc… and less seen in larger hybrid hens. A broody hen will also stop laying; however, unlike a feather moulting hen a broody hen will sit on her nest continuously. Broody hens will sometimes pluck her feathers from localised areas on her body most likely the chest area and the base of her tail, she uses these to line her nest to help keep it warm. Sadly, there is not much you can do to discourage a broody hen but being able to spot the difference between a broody and moulting hen is always good to know as your moulting hen will need a more protein rich diet during her moult.
- Shock Moult Stress. Sometimes chickens suffer with stress, this is more widely seen in smaller bantams and pure breed chickens but can occur in any breed of hen. Their environments are very important to them as well as their flock mates. You may see your hen lose feathers if you have made some changes to their run, house, if there has been a fox prowling at night, you may have introduced new flock members or there has been a sudden loss in your flock that may be felt more deeply by one hen in particular. Look at your set up and watch their behaviour to see what you can do to resolve this.
If your hen is showing no other symptoms of an illness, seems happy in herself and has had a sudden and dramatic feather loss then you can be quite confident she is simply going through the moult.
What Can I Do To Help My Chicken Through Her Feather Moult?
When your chicken moults she will use up a lot of her protein and iron stores in her body. Feathers are made of 80-85% protein so re-growing them will pretty much deplete her of protein, you can help her by increasing the amount of protein you give along side her regular pellet feed. Protein is essential for building muscle and new tissue and as she grows new feathers she will benefit from an increase of natural protein. We don’t recommend using soy products but alternatively use natural healthy sources such as seeds, peanuts (in small amounts), by far the best source of protein are mealworms and crustaceans. You can also add ½ a teaspoon of ginger powder to her regular feed once a day, ginger has been proven to help speed up the growth of new tissue and feathers so this will also benefit her. Alternatively, you could try our specially formulated Feather Moult Pipinchick Forager Treat Mix, created with extra protein, ginger, added B12 vitamins and complexed carbohydrates which will also give your hen an energy boost during her moulting period.
5 Main Symptoms That Your Chicken Is Feather Moulting
- Sudden and dramatic loss of feathers.
- Pale combe and wattles.
- Reduction or even complete stop in egg production.
- Increase in appetite especially for proteins.
- New feather growth.
What Do I Need As A First Time Chicken Keeper?
Thinking of keeping chickens? Not sure what you'll need? Pipinchick have put together an essential check list for the first time chicken keeper.
How Much Space Do My Chickens Need?
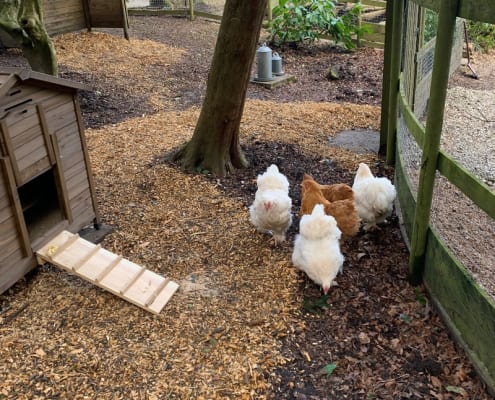
If you want to keep chickens the first thing you need to think about is how much space you have. Most of the pet chickens available from Pipinchick need little room and are well suited to a back garden or small paddock. If you want to keep Hybrids then you will need a larger area as they will ruin your garden and create quite a bit of mess, especially through the winter. With Pipinchick’s birds you will need less room and can keep your chickens in a back garden and smaller space, we recommend about 1.5 mtrs square per bird.
Once you have decided how much space you can spare for your chickens you will need to create a run, (your house should be inside this secure area). If you have flightless birds such as Cochins, Silkies or any Fizzle Feather Bantams a 2ft high fence will keep them enclosed. If you choose birds that can fly you will need a 6ft high fence. Make sure you dig your fence wire down into the ground by about 2ft, this will make it difficult for the fox to get in under your wire. We recommend a small gauge wire and double layer if you can, foxy loxy can’t get his paws and snout through a small gauge, if the gauge is larger than 2.5cm he will be able to rip it open.
You can have a grassy run, however, chicken do like to scratch about so we recommend an area within your run that is laid to gravel or bark to allow them to scratch the ground which is a natural behaviour and makes them happy, it will also mean their nails won’t get too long as scratching in the bark or gravel will keep them short.
If you can create a covered section of your run, most delicate bantams don’t really like to be wet and having a dry area will also help with any mud or mess during the winter months.
What Is The Best House For My Chickens?
Housing is very much dependent on what kind of birds you want and how many. Bantams require little room so you would not need a very large house, Cochin and Brahma will need a slightly bigger house and opening. We recommend a starter house that can hold up to 5 or 6 bantams, these are usually about 1.5 – 2 mtrs squared. The house space is less important than the outdoor space as the birds will mainly use this for laying and sleeping. They snuggle up together at night and you’d be surprised how little space they take up when sleeping. If you have flightless birds do not get a house with a ladder as they won’t know how to use it properly and will become stressed if they cannot get in and out easily.
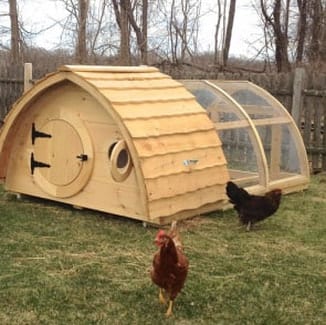
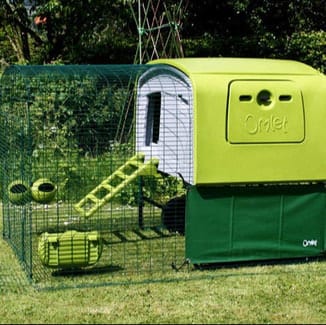
If you have birds that can fly then an Eglu “Go Up” or a wooden house with a ladder is ideal, they will also prefer to roost at night so make sure there are perches inside. This is less important for flightless birds as they will sleep together on the floor of the house. Plastic houses are good because they are easier to clean and keep on top of mites and bugs. Wooden houses are lovely to look at but can be difficult to keep clean. Mites live in wood so with wooden houses if you do not keep a strict cleaning and disinfecting routine can cause problems. Make sure which ever house you choose there is a separate area within for your hens to lay their eggs, this should be off the main sleeping or roosting area.
How Do I Keep My Chicken Run And House Clean?
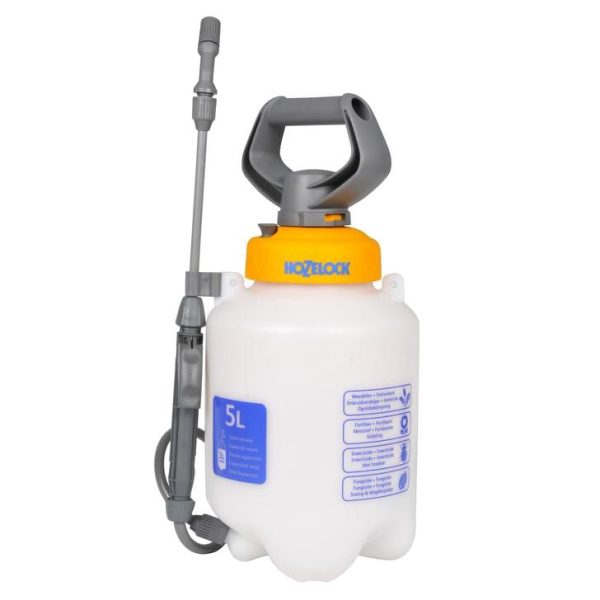
We recommend a deep clean of your houses every 2-3 months. We use a disinfectant called Virkon, it kills everything! You can buy this in one dose sachets from most agriculture centres or farm shops. It is diluted in a 5ltr garden sprayer.
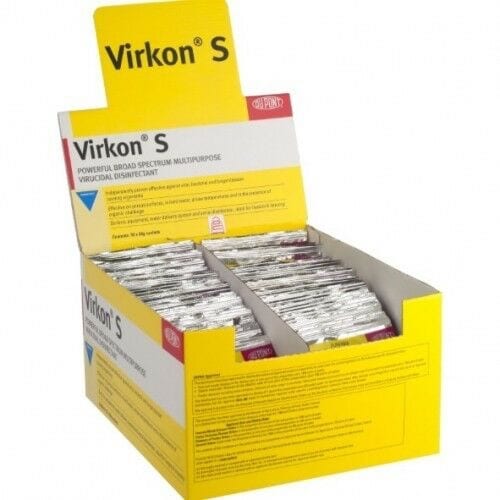
Remove your birds and take out all their litter and then clean the house with washing up liquid in warm water. Once you’ve done this spray the entire house and run inside and out with the Virkon solution. Leave for 24 hours then you can put fresh litter and your birds back in.
Always use a face mask and rubber gloves when spraying disinfectant.
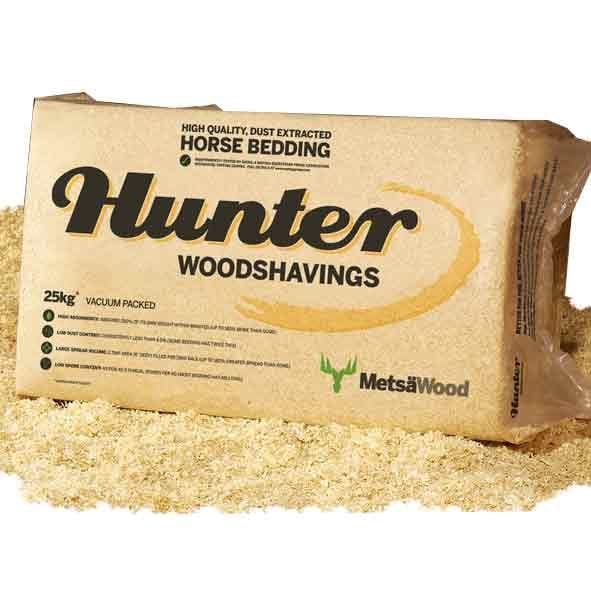
What Chicken Litter and Bedding Should I Use?
We recommend using sawdust or wood shavings only! Straw can contain mites and bugs and you could be bringing in unwanted guests to your clean and disinfected chicken coop. Sawdust and shavings are heat sealed and then vacuum packed which kills any bugs and nasties.
What Chicken Feeders and Drinkers Do I Need?
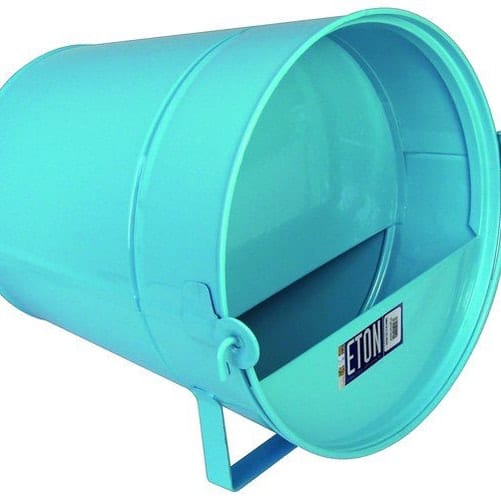
You will need a drinker and a feeder, which type you get is up to you. We prefer galvanised drinkers and feeders as opposed to plastic, this is because they last longer and look nicer but this really is up to you. Plastic drinkers and feeders can become brittle and break over time.
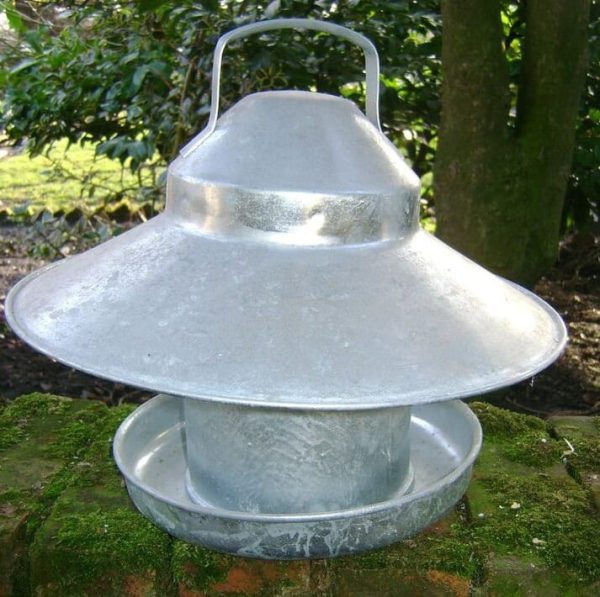
There are many different brands but we like the Eton galvanised range, they are a little more expensive, but look good and will last longer. They come in many sizes and colours so follow the guidelines for how many birds you have to which size you get. Remember where there are chickens there are usually rats, it’s a sad fact of chicken keeping. You can minimise this by not over filling your feeders and raising them off the ground.
Can I Give My Chickens Multi Vitamins and Tonics?
We strongly recommend that you use a multi vitamin for your pet poultry, this should contain B12 vitamin. You can buy tonics and multi vitamins from most pet shops nowadays, or you can always go to a farm shop or even buy online. They are very easy to buy and well worth doing! Delicate bantams will need this bi-weekly in their water and then constantly through the winter months.
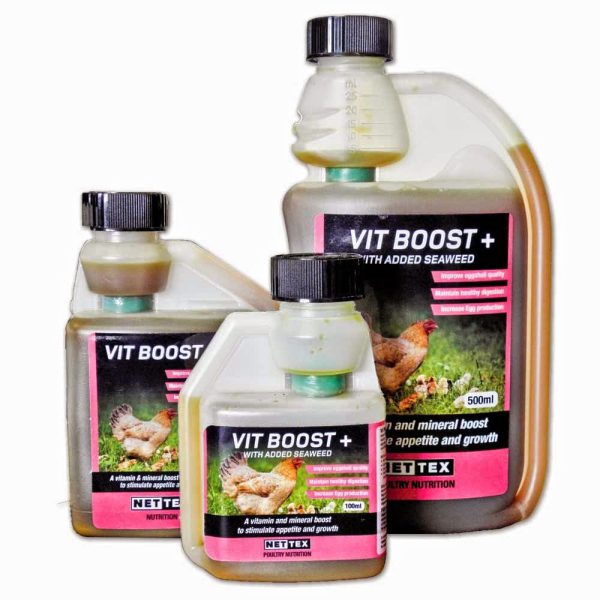
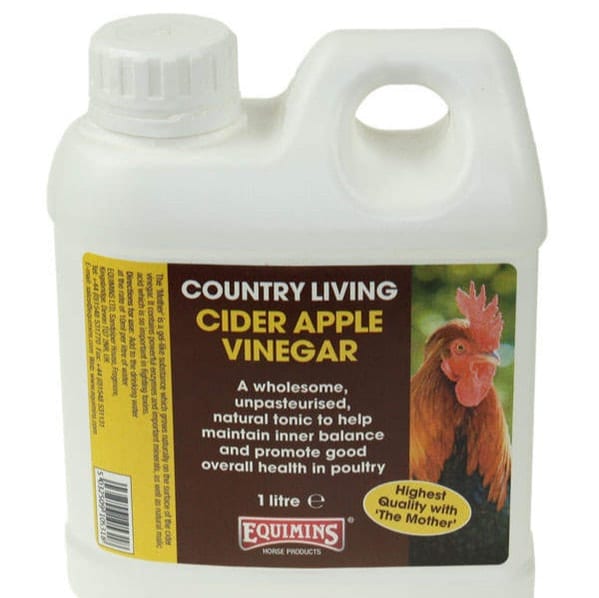
It will help boost their immune system and keep them strong and healthy. You can also give Apple Cider Vinegar as well. We use a farming brand of tonic with B12, this is only sold in large quantities, but have a look at what is available for the back-garden chicken keeper, there are lots of options available online or in stores.
What Feed Should I Give My Chickens?
Again, this is down to personal choice. We use Fancy Feed as they are a well-known brand for poultry rearers and their quality of feed is good. You can choose any brand you like, even organic if you prefer. The type of feed depends on their ages.
0 – 4/5 weeks use a good quality chick crumb or mash.
4/5 weeks – point of lay (POL) use a good quality rearer or growers pellets.
POL onwards – layers pellets, you can mix some dried corn, seeds and grain into their feed as well.
You can give treats once they are fully grown and on layers pellets, introduce treats carefully as too many can cause diarrhoea.
(for more information on how to introduce treats and new feed please see our FAQ page)
Your Chicken's diet should be made up of 80-90% pellet feed and then you can offer corn and treats as well.
How Do I Treat My Chickens For Red Mites?
Getting mites in your coop is pretty heart breaking, your poor hens will be itchy and uncomfortable. Red Mites along with other mites live on the bird but can also live in the wood of the house and can also reside in their bedding. They can cause skin rashes and irritations, lameness, diarrhoea and can even be fatal if left untreated.
Red Mites, What You need To Know
First of all don’t be afraid to glove up and hit them hard, red mites can’t live on humans so you are safe to tackle the issue head on.
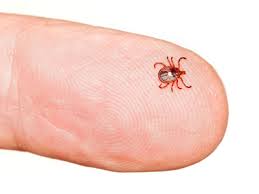
Red mite are tiny but will be visible on the birds, they are around the size of a pinprick, grey initially and then turn red after they’ve fed on your hen’s blood!
They live inside the chicken coop, lay their eggs within crevices and cracks, and feed on all parts of your poor chickens whilst they sleep at night including: blood, the feathers, the skin and the scales of your chicken’s skin!
Red mite will take hold of your coop very quickly if left untreated. After being laid, the mite larvae hatch within 2-3 days and are fully grown adults within 7 days, they can then live for 8 months!

How Do I know if I Have Red Mite?
Red mite is pretty easy to see on your hens, check their back end and look under the feather fluff on the skin, if you have mites you will see them. You should check your hens over once every month or so to ensure they are well and looking for
mites is key when you do a health check. There are other signs that you may notice that might lead you to want to have a look for mites on your bird.
-
- Reduced egg production
- Lethargic & unhappy birds
- Weight loss
- General poor health, your chickens could develop anaemia due to the blood loss – be on the lookout for pale, floppy crowns as a sign.
- Your chickens may not want to be put away at night since the mites attack in the evening, they are reluctant to enter the coop for fear of being nibbled.
Some of these symptoms could be related to other issues but if you notice any of them it is best to give your hens a good check over.
Can I Treat Red Mite?
YES!
Here is out 3 step guide to treating red mites in your poultry and house.
Step 1.
Take all your chickens out of the house and run and put the girls somewhere temporary for a few days, try to limit the places they go so as not to spread the infestation around even more.
Give each hen a good wash in warm water using a medicated pet shampoo, make sure you rinse each bird thoroughly and pay special attention to their bottom area as this is where mites like to gather. Blow dry the hens fully then cover them in Natural DE powder using gloves you can massage it into their feather base to ensure it makes contact with the skin. Use a DE Puffer for easy application, simply puff the powder directly on to the hen with no mess or fuss.
Step 2
Remove all dirty litter form the hen house and then scrub the house down with a poultry cleanser inside and out, use warm water and a good strong scrubbing brush.
Then, using a Virkon sachet diluted into 5ltrs of water in a garden sprayer, spray generously to disinfect the entire coop inside and out, get in all the corners and at the same time do the entire run ensuring the Virkon solution gets everywhere, (use gloves and wear a mask). Virkon is fantastic we use it on our farm and it will kill everything.
Step 3
Once you have done this you will need to let the house and run dry out unoccupied for 24 hours, you can then put fresh wood shavings back in your coop, do not use straw! Straw can actually contain mites and could bring mites back into your now lovely clean environment. Sawdust or wood shavings are heat treated when sealed killing off all mites and bugs.
Repeat the entire cleaning regime every 2 months or so until you are on top of it and then to maintain good cleanliness going forward repeat the whole process once every 4-5 months or if you spot another mite. A really deep clean will prevent mites taking hold and performed regularly means you should never have an issue with mites again. Ensure you provide your hens with a dust bath that has been treated with Natural DE powder, this will allow your hens to naturally keep mites at bay by dust bathing in this mixture of sand and DE powder. We also recommend applying DE powder direct to you hen with a puffer bottle once every month going forward.
How to hatch fertile eggs with a broody Silkie.
5 Simple Steps on how to use your broody Silkie chicken to hatch eggs for you.
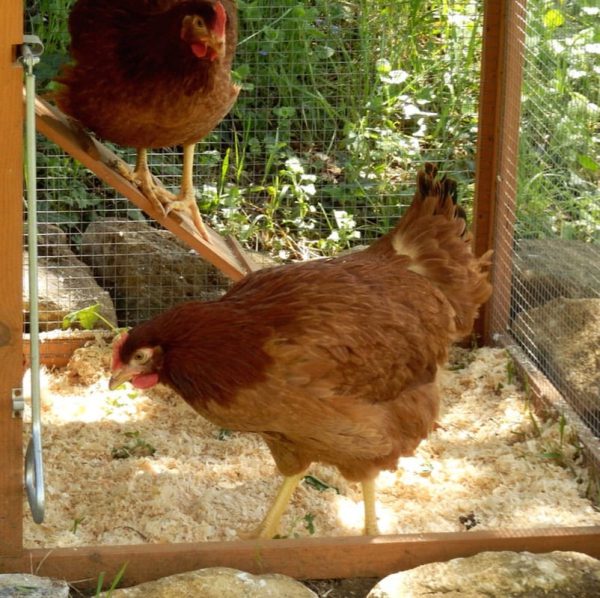
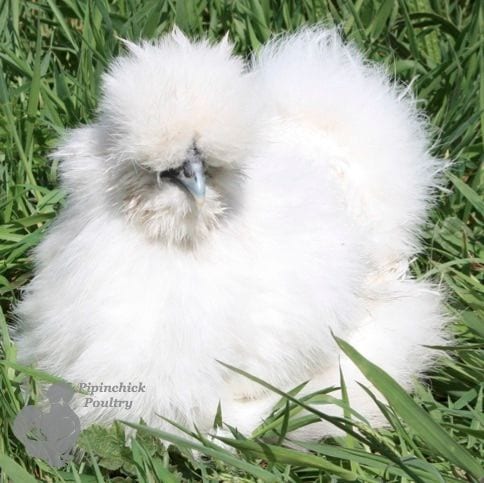
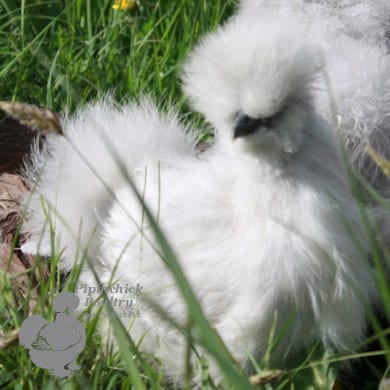
Silkie chickens are by far the most broody of the chicken world, often going broody even with no eggs to sit on, a Silkie chicken will sit fast even if a herd of wilder beast are running through her coup! Not much will shift her!
This makes her the ideal chicken to hatch fertile eggs with a great success rate.
They are wonderful for hatching eggs because not only are they very broody but they make wonderful mothers and you will not need an artificial brooder and light she will do all the work for you.
So whether you want to hatch more Silkies, other hen eggs or even ducks a Silkie is your one stop incubator solution for hatching small numbers.
See below Pipinchick Poultry’s 5 simple steps to hatching successfully with a broody Silkie chicken.
1. How to tell if you have a broody hen.
Silkies will be very easy to spot once they have gone broody, they will stay in their nesting box and will NOT come out, they will cluck at you if you get too close to them which is a very uncharacteristic trait of a none broody Silkie.
You can encourage a Silkie to go broody by placing a couple of dummy eggs in her nest area, these can be unfertilised eggs or rubber dummy eggs which you can buy from any good pet store or poultry centre.
Once you have noticed that your Silkie is broody you can then put fertilised eggs under her.
For the best chance of a good hatch rate you do not want your eggs to be more than 10 days old.
2. How many eggs can my broody Silkie hatch?
Silkies will also hatch other species for you, from ducks to other chicken breeds; she will then raise those babies as her own.
She is an amazing mother and diligent to her young.
When you have noticed your Silkie is broody you can then put fertile eggs under her, up to 10 bantam eggs, 6 normal hen eggs or 5 duck eggs. She can even sit on larger eggs but I would only put about 2-3 under 1 hen.
3. How to manage a sitting Silkie hen.
If you have decided to use your broody Silkie to hatch eggs then she will not require much from you.
Make sure she stays warm and dry.
She will get off to eat once a day but keep an eye on this as sometimes a Silkie can go so broody she will forget to eat or drink, make sure the food and water is close by so she can get to them easily. If she is not getting up to eat and drink then you will need to remind her that this is a god idea.
Gently move her off her eggs, she will give you a little bit of chatter but persevere, once she is off she will automatically go for her food and water then immediately sit back down again.
She will almost never not sit back so don’t worry, if she does not sit back then you will have to move the eggs quickly to an incubator…. But this never happens!
Keep an eye on her after this, she should then remember to get up and feed, if she doesn’t just keep repeating this once a day until she does.
The eggs will take up to 21 days to start piping in the case of hen eggs.
Eggs from common ducks like Pekins require 28 days to hatch. Eggs from Muscovy ducks hatch in about 35 days.
4. What to do when the eggs start Pipping.
When your eggs begin to pip (the chick uses their little beak to break the shell from the inside). This means your chicks are on their way, this can begin anywhere from 2 days before hatch date to up to 2 days after so the main thing is to be patient.
With a sitting Silkie you will not need to do much, she will do the work for you; just keep an eye on her.
If you have a lot of other hens in your coup you may need to move them to allow your Silkie some peace to hatch the new babies. I wouldn’t advise moving Mumma at this stage as it might disrupt her.
Once her babies are hatches and a few days old then you could move her and them to a secluded location away form jealous older birds and cockerels.
(However a coop of only Silkies will not hurt the new arrivals not even the cockerels).
Keep an eye on your Silkie as she hatches her new chicks, but don’t be tempted to “help” your chicks out of their shells.
If they’re not pipping or they’ve pipped but they’re not pecked a out of the shell they’re not ready, leave them! By “helping” you could release a chick too early and without meaning to you could kill it.
If the yolk sac together with the blood vessels have not been fully absorbed into the stomach, the likelihood is that trying to ‘help’ by peeling away the shell will rupture one of these blood vessels and the chick will bleed to death.
Remember – from pip to hatch can take as long as 36 hours.
Let Mumma do the work she knows what she is doing!
Once all the chicks have hatched then you can help by removing old shells.
We once had a Silkie hatch 8 chicks in the dead of winter, we did offer her some help in the beginning by putting in a hot water bottle with her at night, to help keep the babies warm, I’m not sure of this is what you should do but we didn’t loose any and Mumma hen seemed happy with it, otherwise just let her be.
5. What do I feed the new baby chicks.
Put some chick crumb in the cop with Mum when they start to hatch, in a chick feeder, this will be small enough for the chicks to get to, keep feeding Mum her normal grain but in a feeder that’s raised up off the ground so the chicks can’t reach it.
Once they are 4-5 weeks they can move onto a grower or a rearer then at about 20 weeks they can go onto adult food.
Be careful with water, this will need to be in a chick water feeder, if you put a saucer in or anything shallow and open chicks can fall in and drown very easily.
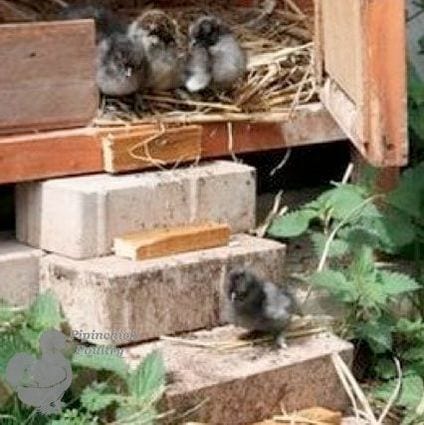
You’re done! You did it, you now have a lovely little clutch of chicks hatched by your very own broody Silkie. Once the chicks are large enough they can go on their own. You will know when this is as your Mummy Silkie will continue to sit on the chicks to keep them at the right temperature until they no longer need her.
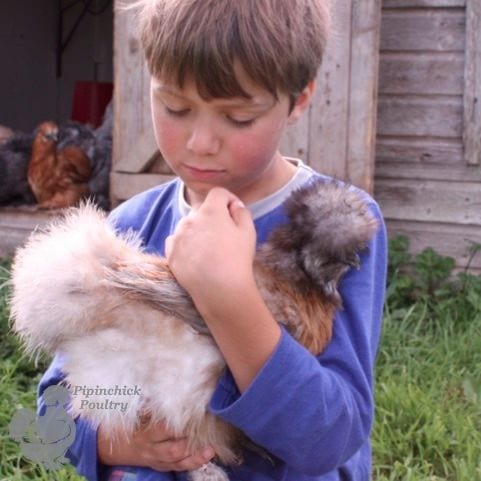
We get asked this question nearly every time we have customers come to the small holding. What's the best way to introduce my new Silkie or hen to my existing flock?
In our experience introducing new birds can be a delicate process and can very much depend on the happiness of your flock going forward.
There are 5 simple steps to take to make this 1st encounter go well.
1. We would never advise trying to introduce 1 bird to an existing flock especially if your new bird is quite a bit younger. They will instantly get picked on and ostracised from the existing group. The best way is to buy them in pairs, this way the new birds have an instant ally and are not such an easy target.
2. Make sure you have plenty of room in your run as if there is some hen pecking and territorial bullying there is plenty of room for the birds to run away and escape.
3. Never introduce birds face to face in the cold light of day! This always ends in an argument of some kind.
4. Keep your new birds separate form your flock until night fall. Once your existing flock are sound a sleep in their coop, literally in the dead of night, gently put your new birds in the coop amongst the sleeping flock.
5. In the morning let the birds out into the run and by then they have all night to get used to each others smells and will adjust a lot easier to the idea of new birds in their flock.
Good luck, do let us know how you’ve got on either using this technique or not using it, we'd love your feedback.